Zonebit
个人的奋斗还是历史的进程?
2018-02-02-如何进行前端测试
1. 开始之前需要了解的概念:
assertnode自带的断言模块mocha测试框架karmaTravisCI持续集成
简单的介绍一下,assert是node自带的断言模块,打个比方,相当于主角必备的道具,mocha是测试的主角,karma是测试的导演,TravisCI就不用做什么比喻了,负责持续集成
2. 首先,写一个assert例子
var assert = require('assert');

assert.equal([1,2,3].indexOf(4), -1);
这个表达式使用了assert提供的equal方法,传入两个参数,如果两个参数的返回值相等,equal方法返回true
3. 使用mocha提供的方法把它包起来
var assert = require('assert');

describe('Array', function() {
  describe('#indexOf()', function() {
    it('should return -1 when the value is not present', function() {
      assert.equal([1,2,3].indexOf(4), -1);
    });
  });
});
这段代码的大致意思就是,我们要描述Array数组,进一步的,描述Array数组的indexOf方法,这个方法是在数组里面不包含参数时返回 -1
这里面有两个关键的方法名,就是describe和it,这就是mocha测试框架使用的主要的两个方法
这样,我们就完成了一个最简单的测试单元的编写,在终端中使用 mocha 命令运行,就可以得到下面的结果
$ ./node_modules/mocha/bin/mocha

  Array
    #indexOf()
      ✓ should return -1 when the value is not present

  1 passing (9ms)
显示9ms的时间通过了一个测试用例,并且用√号标记了出来
关于assert断言的其他方法,可以在node官网文档中找到,除了最常用的equal,另一个需要注意的就是用来测试函数的throws方法,这里就不再赘述
mocha中除了describe和it还有before,after这样的钩子方法
了解了assert和mocha的使用之后,我们需要让测试变得更加强大和便捷,以应对多浏览器多平台的兼容性等等问题,好比只有把航站楼、停机坪、跑道组合在一起才能作为一个机场去接送旅客,为了完成复杂的测试,我们需要karma的帮助
4. karma.conf.js
为了使用karma,我们首先需要安装一些依赖,除了karma本身,还有karma-mocha——让karma可以配合mocha使用,karma-cli——可以在终端使用 karma start 启动,karma-chrome-launcher——为什么是chrome而不是其他,比如Firefox或者别的什么,这完全取决于我们需要在哪些平台上进行测试,npm上可以找到几乎所有的karma-launcher
然后,就如题目所示,我们需要一个名为karma.conf.js的文件,这个文件可以通过karma init来自动生成,按照步骤一步一步完成问答即可,最终的文件内容如下:
// Karma configuration
// Generated on Mon Jan 29 2018 15:16:20 GMT+0800 (DST)

module.exports = function(config) {
  config.set({

    // base path that will be used to resolve all patterns (eg. files, exclude)
    basePath: '',


    // frameworks to use
    // available frameworks: https://npmjs.org/browse/keyword/karma-adapter
    frameworks: ['mocha'],


    // list of files / patterns to load in the browser
    files: [
      'https://cdn.bootcss.com/jquery/2.2.4/jquery.js',
      'node_modules/should/should.js',
      'test/**.js'
    ],


    // list of files to exclude
    exclude: [
    ],


    // preprocess matching files before serving them to the browser
    // available preprocessors: https://npmjs.org/browse/keyword/karma-preprocessor
    preprocessors: {
    },


    // test results reporter to use
    // possible values: 'dots', 'progress'
    // available reporters: https://npmjs.org/browse/keyword/karma-reporter
    reporters: ['progress'],


    // web server port
    port: 9876,


    // enable / disable colors in the output (reporters and logs)
    colors: true,


    // level of logging
    // possible values: config.LOG_DISABLE || config.LOG_ERROR || config.LOG_WARN || config.LOG_INFO || config.LOG_DEBUG
    logLevel: config.LOG_INFO,


    // enable / disable watching file and executing tests whenever any file changes
    autoWatch: true,


    // start these browsers
    // available browser launchers: https://npmjs.org/browse/keyword/karma-launcher
    browsers: ['Chrome'],


    // Continuous Integration mode
    // if true, Karma captures browsers, runs the tests and exits
    singleRun: true,

    // Concurrency level
    // how many browser should be started simultaneous
    concurrency: Infinity
  })
}
这些参数里面我们最需要关注的有三个:
- frameworks
- files
- browsers
分别意味着,使用什么测试框架,加载哪些文件,在哪些浏览器上运行这些测试
设置完成之后就可以启动karma
这里需要注意一下那个singleRun参数,如果设置为true,浏览器就会一闪而过,跑完测试就自动关闭,所以在本地浏览器进行测试的时候,应该事先设为false
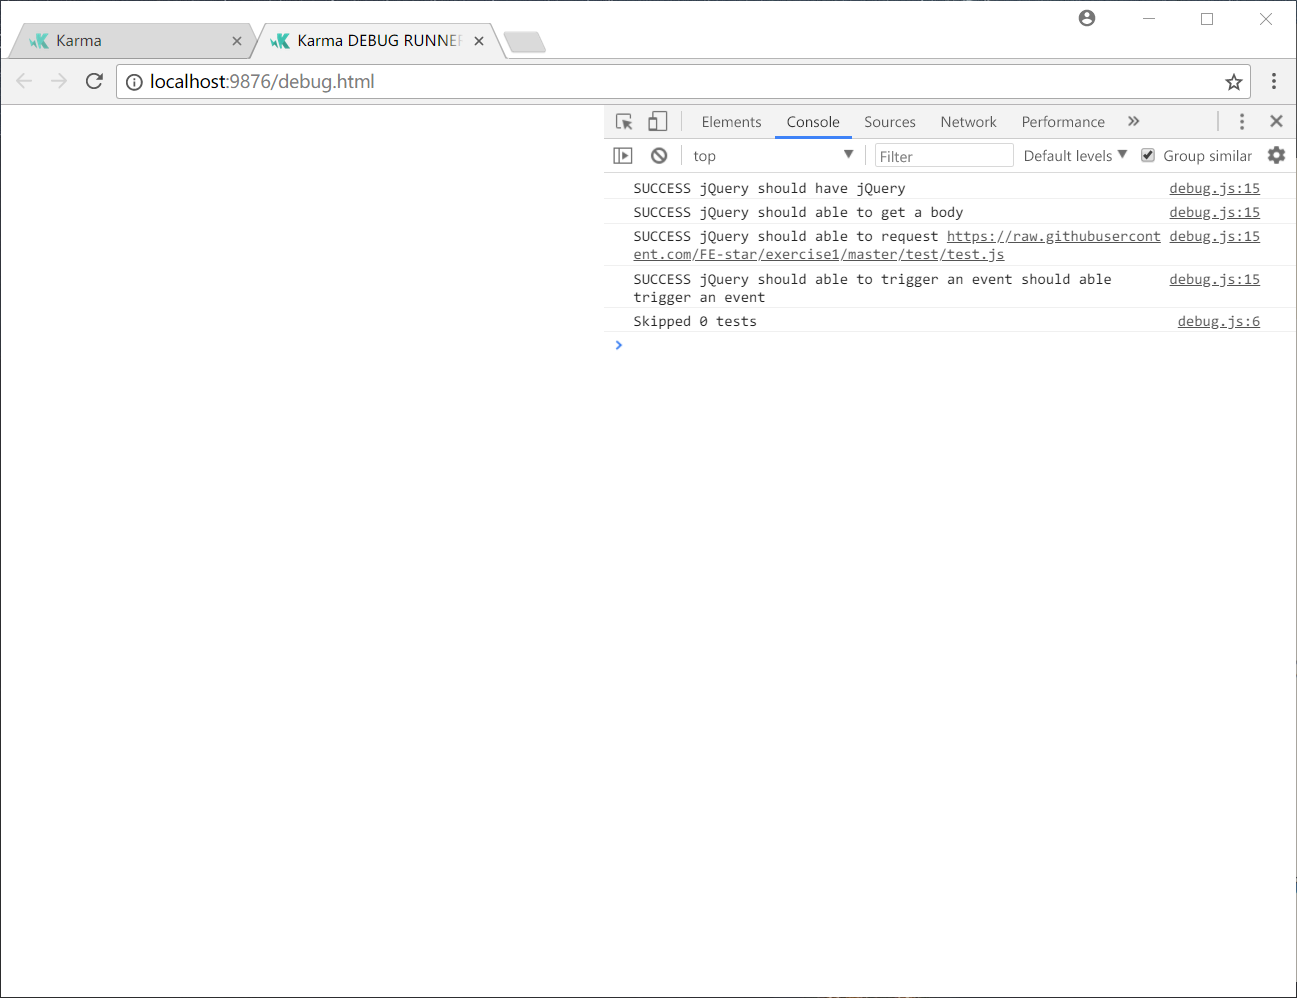
启动成功后就会出现如下界面

点击右上角的debug按钮就会打开测试页面,然后打开控制台就可以看到karma输出的测试信息了
5. 持续集成
要想将测试项目集成到TravisCI,我们需要先在官网上关联登录一下GitHub,然后所有的项目就都会显示在你的个人主页下面
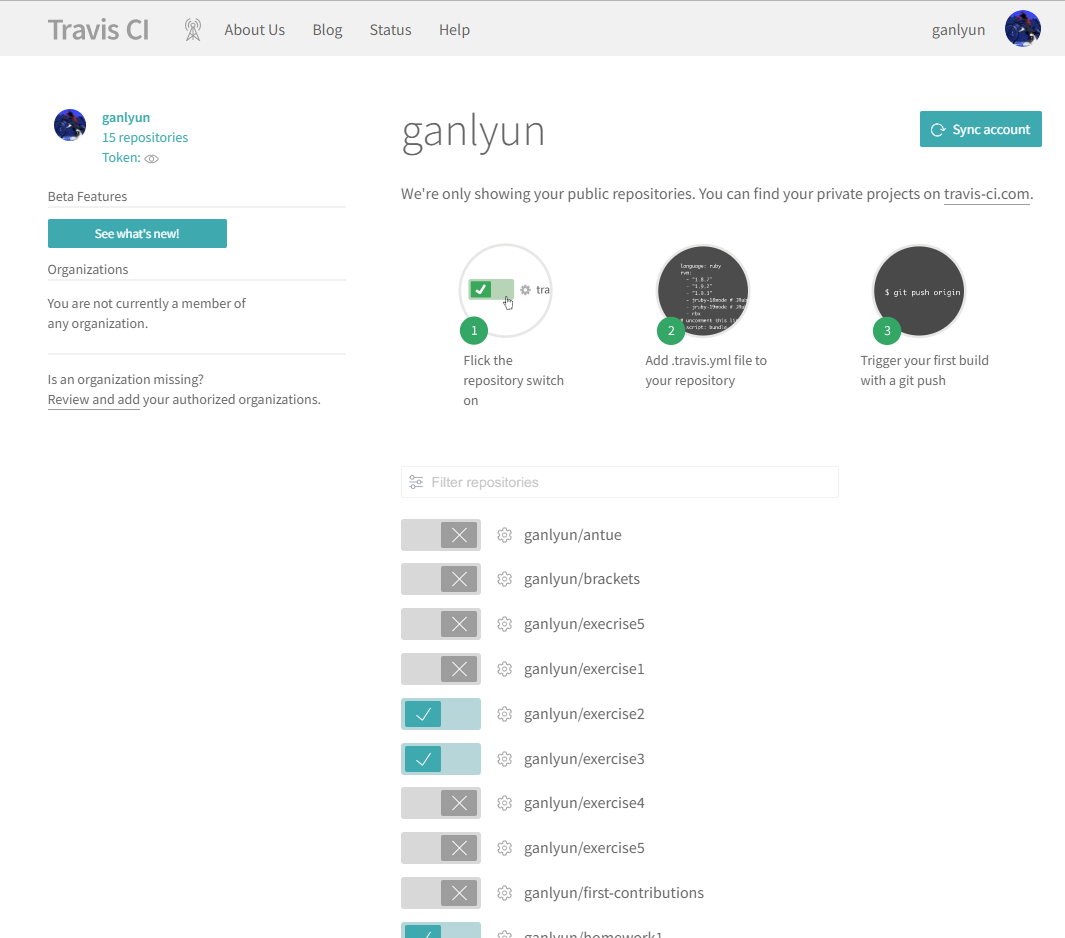
触发构建只需要三步:
- 打开需要持续集成的项目的开关
- 在项目中创建
.travis.yml文件 - 使用
git push命令触发构建
这三步里面唯一需要学习的就是.travis.yml的配置了,如果你只是需要在node环境下运行mocha,非常简单,只需要配置运行的node环境和版本号
language: node_js
node_js:
  - "8"
但是如果要使用karma就会复杂一些,因为使用karma测试时,需要图形化界面
language: node_js
node_js:
  - "8"

sudo: required
addons:
  chrome: stable

before_script:
  - "export DISPLAY=:99.0"
  - "sh -e /etc/init.d/xvfb start"
  - sleep 3 # give xvfb some time to start

before_install:
  npm install karma-cli -g
从上面的配置可以看出,我们设置启动了一个名为 xvfb 的服务,这个服务就是为应用程序提供虚拟的 X server,换句话说就是为应用程序提供一个桌面环境
为了理解X server,需要首先了解一下Linux图形界面层次关系:
linux本身 –> X server <-[通过X协议交谈]-> 窗口管理器(综合桌面环境)–> X应用程序
export DISPLAY=:99.0 这句没有搞清楚,后续补充
其他的,看字面意思都可以理解了,addons设置浏览器插件,我的例子里面只设置了Chrome一种,before_script和before_install两个钩子分别指定相应构建阶段所需要做的事,关于sudo,我在文档中找到这么一句话:Any of the following sudo or docker related settings route your build to a sudo-enabled linux (Ubuntu Trusty) environment on Google Cloud Engine. 熟悉Linux的人都懂,在Travis中使用Linux环境,这个命令也是必须的。
喘口气先
到这里,如果配置的没有问题,git push一下,TravisCI就会自动开始构建了,成功后就会是下面这样
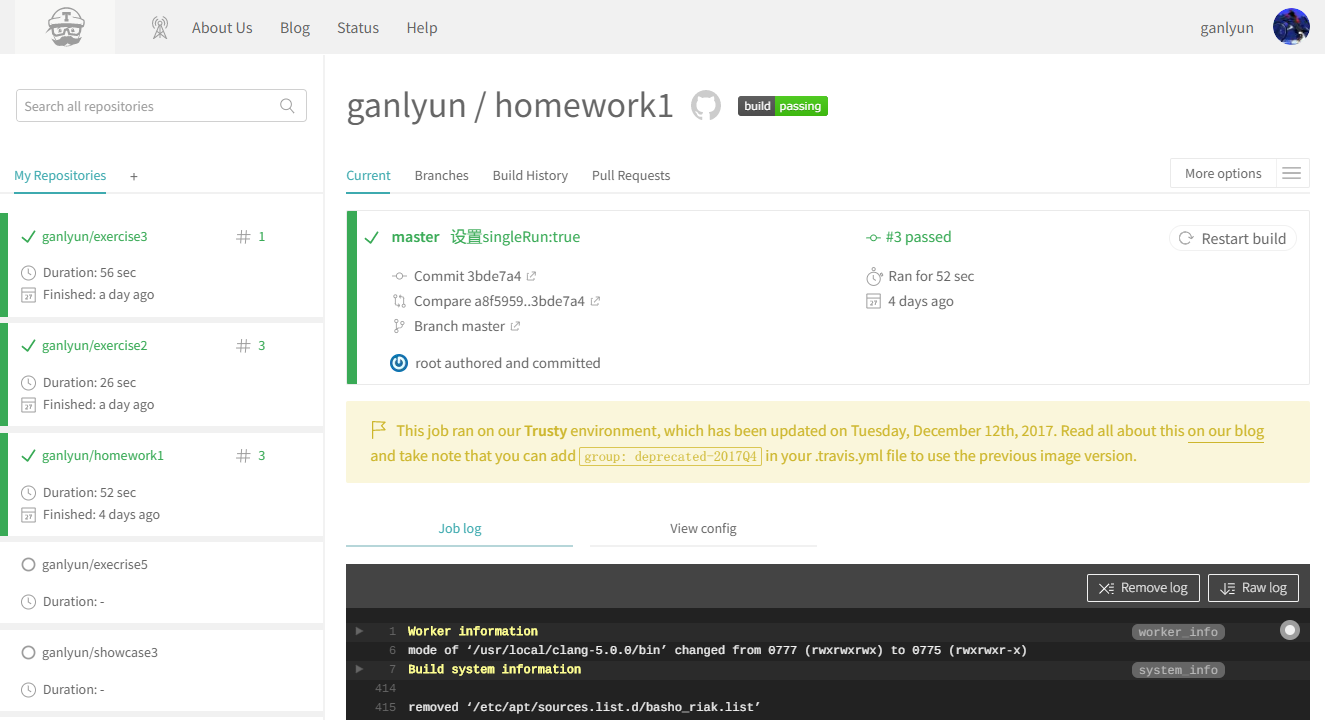
一片绿